Sunday, June 3, 2012

Turkey St. Joseph


Growing up, I spent a lot of time at my Auntie Patty's house with my cousins Becky and John. We'd have sleep overs and Auntie Patty would make yummy food for all the friends and relatives filling her living room. One of those yummy foods was Chicken St. Joseph which was everything you had at Thanksgiving Dinner in one casserole topped with the stuffing. 

This recipe has been augmented due to a lack of chicken and a plethora of left over turkey (But poultry is almost always poultry. Unless we're talking duck 'cause duck is decadent poultry - completely different than poultry. So fatty and juicy and meaty. Oh! It's divine! I digress.), also Nick requested that it be served over garlicky mashed potatoes.

You will need:

approximately 4 to 5 cups of left over turkey/chicken
2 medium carrots
1 large stalk of celery
1/2 large onion
butter
1/3 cup flour
1 box of low sodium chicken broth
fresh rosemary and thyme
2 cups of frozen sweet peas
approximately 5 cups of cooked stuffing
salt and pepper to taste

 
Preheat oven to 375 degrees. Saute in a large pan with a couple tablespoons of melted butter: half a large onion chopped, a large stalk of celery finely chopped and thickly dice 2 carrots.


Sauteing the veggies in butter should take 20 minutes.


While it is sauteing, cube left over turkey or chicken and put in medium mixing bowl. Add 1/3 cup of flour, salt and pepper, and toss to coat the cubed turkey. This will help make the gravy when you add the chicken broth.
  

Add enough chicken broth to nearly drown the ingredients in the pan. Add the fresh herbs, stir, cover and let simmer until the gravy thickens. 

Remove fresh herbs and pour filling into a casserole dish. Make stuffing. You can use a mix or make your own. I used a mix because I'm just not that motivated. Cover filling with stuffing and bake for 30 minutes. If you want to serve it over mashed potatoes or rice, this would be a good time to make it.


Saturday, June 2, 2012

Lime Cream and Raspberry Pie


This pie was supposed to be a key lime pie but since the grocery stores here decided to have key limes every time I've been there except when I needed them for this pie, I bought a bunch of limes. I'm sure you could use key limes if you have them, although this recipe is nothing like a key lime pie recipe.

First I preheated the oven to 350 and made a graham cracker crust:

1 & 1/2 packages of graham crackers crushed
1 stick of melted butter

Mix well and press into the bottom of a pie dish. Bake in the oven for 15 minutes. While the crust is still hot, spread approximately 1/2 to 1 cup of raspberry jam over the crust being careful not to disturb the crust. It is easy to pull up the crust with the jam if you aren't careful while spreading it around.

Then prepare the filling. You'll need:

16 ounces of cream cheese
zest of 3 limes
juice of 6 limes - approximately 3/4 cup of lime juice
a can of sweetened condensed milk
approximately 1/2 to 3/4 cup heavy cream
3 egg yolks

First mix together the cream cheese and lime zest. Slowly pour in the lime juice so you don't make a mess. Add the sweetened condensed milk and egg yolks. Then add the heavy cream until it reaches a thick cheesecakey consistency.

Bake in the oven for 30 minutes. Remove and let it rest for 10 minutes then chill in the fridge for 3 to 4 hours. Serve with lots of whipped cream. I hope you enjoy it. 


Sunday, January 29, 2012

Key Lime Pie - Super Easy

I crave foods all the time but I've been craving a key lime pie for about 3 months now so I decided to finally make one. I remembered watching my mother make key lime pie before and figured I could probably improv one from memory. My mother typically uses a pastry crust for her pies but I decided to use a graham cracker crust for mine. I used an entire bag of key limes.

Confession:
I have to admit that I didn't find the key limes in the grocery store at first so I picked up a few regular limes before happening upon the randomly placed key limes in the produce section - they were next to the sweet potatoes... Anyway, I discarded the bag of regular limes in the sweet potatoes instead of putting them back where they belong. It made me feel super guilty.

Back to the recipe, I zested 4 of the key limes and juiced all of them which gave me a little over 3/4 of a cup of juice. Which is a lot of juice, I think. However, I have a rather large pie dish so I figured it would be fine to use all of the juice. Anyway, the filling turns out to be about a rather large amount. Here is the recipe:

Preheat the oven to 350 degrees.

Crust:

Smash 1 & 1/2 packages of graham crackers and mix it together with 1 stick of melted butter. Yes, you need an entire stick! Bake for 15 minutes.


Filling:

2 cans of sweetened condensed milk
3/4 cup of key lime juice
zest of 4 key limes
4 oz of cream cheese
4 egg yolks


Thoroughly mix these ingredients together. Pour in pie crust. Bake for 30 minutes. Let it cool in the fridge for at least 3 hours. Enjoy.


Homemade Pizza


Homemade pizza is surprisingly easy to make and is a great way to learn how to make yeast dough. The recipe for the dough has few ingredients and it is a good way to experiment with bread making techniques. One thing you should remember about bread baking... people have been doing it for centuries and they have been doing it without all kinds of specialized equipment. Don't be afraid of it!

I got the basic recipe for Pizza Dough from the Washington Post more than 30 years ago when my husband, Patrick, and I were living in Fairfax, Virginia. What caught my eye about the recipe was the use of fresh ground pepper in the dough. I really love pepper and found that it gives this dough some real zip and adds great flavor to the pizza overall.

Over the last 30 years, I have experimented with it a bit. The recipe I use now is the same basic recipe I found in the newspaper with one exception. I add a couple of tablespoons of olive oil to the dough. I also cook the pizza on a preheated pizza tile because it makes the crust nice and crunchy.

My method for deciding how much dough I will make starts with the liquid. For each pizza I will use 3/4 of a cup of warm water [2 pizzas means 1 and 1/2 cups of water, etc]. [Test the temperature of the water the way you would a baby's formula - put a few drops on the inside of your wrist. If you can't feel it, it means it is just right - neither too cold or too warm]. For each 3/4 cup of water, I use 1 and 1/2 tsp of dry yeast and 1/2 tsp sugar.


Proofing the Yeast
Stir the yeast and sugar into the warm water. Here you can see how the yeast has already started to proof [grow].

Adding Flour & the Rest of the Ingredients

For each pizza, add 2 tbsp of olive oil, the yeast mixture, 1 and 1/2 tsp of salt, 1/2 tsp of freshly ground pepper and enough flour to make a sticky dough [about 2 cups]. Turn the mixture out on a flour covered counter and knead it until it is nice and soft and just a tiny bit sticky. Do not knead too much flour into the dough; it will be tough and difficult to flatten into a crust.

Place the dough in a greased bowl, turning it over once. Cover the bowl with a damp cloth and let rise for one to two hours.

Toppings

While you are waiting for the dough to rise, you can prepare the toppings. I usually like sausage, peppers, mushrooms, black olives and onions on my pizza. The guy I usually share it with only likes the sausage and the peppers and sometimes onions. As you can see from the picture above, I have placed mushrooms in a large cast iron frying pan to which I have added about 1 tbsp of olive oil. Cook the mushrooms over medium/high heat stirring often so that they do not burn. If you want nicely browned mushrooms, it is important that you not crowd them in the pan. They should be spread out in a single layer. When they are nicely browned, remove them from the pan and put them in a bowl. Cook sweet Italian sausage until they are done all the way through and slice them into rounds. I do not pre-cook the olives, the onions or the peppers.

Preheat the oven to 450 degrees. Convection ovens should be preheated to 425 degrees.

Once the dough has doubled in size remove it from the bowl and spread it out on a flour covered counter. When you have pulled it out to the right diameter, lightly dust the top with flour [this will keep it from sticking to itself when you fold it over].

When you are ready to assemble the pizza, fold the dough over on itself [this is done to make transferring it to the hot tile easier]. Spread some cornmeal on the pizza tile and transfer the dough pulling it slightly to make it fit the tile. [As soon as the dough touches the hot tile it will start to cook so you have to work fast]. Once the dough is spread on the tile, cover the top with a layer of tomato sauce. My favorite for pizza is Trader Joes Tomato and Basil Marinara sauce to which I have added some fresh oregano. One pizza will use about one half of a jar.

I then sprinkle 8 ounces of grated mozzarella, 4 ounces of grated sharp cheddar and 2 ounces of grated parmesan on the top. As you can see from the picture below, I spread sausage and onions on the entire pizza but only one half gets mushrooms and olives.

Cook the pizza in the convection oven for about 10 minutes, or until the crust has started to brown. A regular oven will take slightly longer.

Saturday, January 28, 2012

Cleveland Cassata Cake

One of my coworkers was scheduled to work on her birthday and I offered to make her birthday cake. She told me her favorite cake was a cassata cake and having never heard of a cassata cake, I went home after work and researched what one was. Little did I know that there was a Cleveland Cassata cake which differentiates itself from a traditional Cassata cake by one, being from Cleveland and not Sicily and two, its cakier and does not contain candied citrus. So, after much research I learned that I needed a 4-layer sponge cake, custard, enough strawberries to make thick delicious layers of sweet fruit and a whipped cream frosting.

In order to make this cake, you will need the following tools:

1 large mixing bowl
1 medium mixing bowl
An electric mixer unless you can beat egg whites by hand - I do not have that kind of patience or talent.
1 small sauce pan
1 whisk
A bread knife or a long serrated pastry knife
Two 9-inch cake pans, lightly greased and lined with parchment or wax paper

As for ingredients, you won't need anything fancy but you will need large quantities of a few items and a couple things you may not have in your pantry:

11 eggs
3 pounds of strawberries
cream of tartar
a lemon
3 pints of heavy cream

Making this cake will take two phases, preparation of building materials the night before and assembly the next morning. You will also have to be careful with your eggs. You must have 8 egg whites separated, 5 egg yolks separated and 6 eggs yolks separated for different parts to the recipe. 


To start preheat your oven to 325 degrees then you will have to make the custard:

6 egg yolks
1 pint of heavy cream
1 tsp vanilla
1/2 cup of sugar
1 tbsp of cornstarch

Pour the pint of heavy cream and teaspoon of vanilla into the small sauce pan, add 1/2 cup of sugar and cornstarch. Add the yolks to the cream mixture and whisk over low heat until a thick custard forms. Cover and cool in the fridge overnight.

Next make the cake.

2 & 1/4 cups of sifted flour
1 & 1/4 cups of sugar
1 tbsp of baking powder
1 tsp of salt

Mix together the dry ingredients in a medium sized mixing bowl. In a large mixing bowl, whisk together the following wet ingredients:

5 egg yolks
1/2 cup of vegetable oil
3/4 cup of cold water
1 tsp of lemon zest
1 tsp of vanilla

Slowly add the flour mixture to the wet ingredients. It will be quite thick when all the dry ingredients are added. Next, with an electric mixer whisk the 8 egg whites that you reserved with 1/2 teaspoon of cream of tartar until stiff peaks form. Add 1/3 of the whipped eggs whites to the batter and gently fold them in until they're fully incorporated then fold in remaining egg whites. It is important that you fold them in gently and completely because if you mix them roughly, the egg whites will deflate and the cake won't be spongy and light it will be like a brick and if you don't incorporate them completely, you'll wind up with lumps of egg whites in your sponge cake.

Pour batter evenly into the two lightly greased and lined cake pans. Bake for 30 to 40 minutes depending on your oven, until a cake tester comes out clean. Cool in the pans for 1 hour before running a knife around the edge, removing and wrapping in saran wrap. Place wrapped layers in the fridge overnight. This will allow the layers to become extra firm so that they're easier to slice in half horizontally.

Next wash and slice the 3 pounds of strawberries (I reserved a few slice and 3 strawberries to decorate the top of the cake) and mix with 3 tablespoons of sugar. Refrigerate overnight.

In the morning, unwrap the layers of cake and gently, using the bread or pastry knife, slice each layer of cake into 2 layers, placing each layer on the saran wrap so it won't stick to any surfaces (This will make it easier to transfer to the layering process.). Next, place the first layer on your cake platter and spread a third of the custard over the cake, add a third of the strawberries and repeat with the next two layers: cake, custard and strawberries. Then top it off with the fourth layer of cake. Whip the 2 pints of heavy cream with 1 teaspoon of vanilla and 2 tablespoons of sugar. This may look like way more whipped cream that you'll need but I tried making it with a single pint of heavy cream and it was barely enough. This way, you'll have enough whipped cream to completely cover the cake and some to do some fancy flourishes without it looking like the last picture in the blog.


Then either dig in or let it sit for a few hours in the fridge so the strawberry juices will soak into the cake layers. Either way, its a delicious dessert that I hope you enjoy.


Thursday, January 12, 2012

Lamb Stew and Homemade Bread


Soups, stews and homemade bread make great suppers for snowy winter days. I'd like to share a method for making lamb stew that I think really brings out the flavor of the meat.


Most stew recipes call for cubing meat in bite size pieces, dredging them with flour and salt and pepper [along with other spices] and then browning them in oil. Once the meat is browned, it usually simmers in stock for an hour or two until the meat is tender. Spices, vegetables and other ingredients enhance the flavor of the meat. The result is delicious!

I used to use that same basic recipe until one day when I used leftover roast and gravy as the basis of a lamb stew. The resulting stew was so much more flavorful. From that time onward, our lamb stew starts out as a roast leg of lamb.

To make this recipe you will need a 4 pound leg of lamb [I get mine boneless - it makes it much easier to cut up], 1 tbsp of fresh thyme chopped, 1 tbsp of fresh rosemary chopped, 1 tsp of salt and some freshly ground pepper. You will also need some flour and lamb stock to make gravy. You will need a metal roasting pan and a rack.

First combine the spices and rub into the lamb. Position the leg on the rack and roast in a 500 degree pre-heated oven for 15 minutes. Lower the oven temperature to 350 degrees and roast for another hour or until a meat thermometer registers 175 degrees.

Remove the roast from the pan, reserving the drippings. Place the roasting pan over a burner set to low. Stir 3 tbsp of flour into the drippings [this is called a roux] and gradually add lamb stock [you can use water or beef broth if you do not have lamb stock], stirring to remove any lumps. Season with salt and pepper to taste.

At this point, the roast and the gravy can be refrigerated for a few days if you wish.


When you are ready to make the stew, cut the roast into pieces removing the gristle and fat. Put the stew pieces into a pot with the gravy. Put the trimmings into a skillet with 1 tbsp of olive oil and sear them until the fat is rendered. Add a quart of water and allow the trimmings to simmer until the liquid is reduced by half. After the liquid has cooled, add 2 tbsps of flour and whisk it until it is smooth. Add this to the pot with the meat and the gravy. Simmer until the meat and gravy are hot.

Peal and chop 4 large carrots and 4 medium potatoes. Cook the vegetable separately and when they are tender, add them to the stew. Check the seasonings and adjust them to taste.

Tonight I served this stew with a simple boule bread. This recipe makes two loaves.

3 cups warm water
1 tbsp dry yeast
1 tbsp salt
1 t sugar
2 tbsp olive oil
6 - 8 cups flour

Combine the yeast, sugar and warm water and let it sit until it proofs [it will get quite frothy]. Then add 3 cups of the flour and stir. Let it sit for 15 minutes. Add the salt and as much flour is needed to make a nice dough [do not add too much flour or the bread will be heavy and tough. If the dough is too sticky to knead you can incorporate more flour into it]. Put the dough into a lightly oiled bowl and cover with a damp cloth until it has doubled in size - about two hours.

After the first rising, punch the dough down and shape into round loaves. Place the loaves onto a cornmeal covered baking pan and cover with a damp cloth to let it rise again for about a half hour.

Preheat the oven to 450 degrees. Before placing the dough in the oven, mist the tops of the loaves with water or wet you hand and pat the surface of the dough with water [this will make the crust nice and crunchy]. Bake until the tops of the loaves are medium brown - about 35 minutes.


Cooking Terms:
Roux - A roux is a thickener for many sauces and gravys. It is made by combining wheat flour with fat. In the case of our lamb gravy, the fat was animal fat. If you roast a particularly lean piece of meat that does not leave with with generous drippings, you can add butter to them before stirring in the flour.

Proofing - Dry yeast needs warm liquid and sugar to allow it to grow. It is the gas that the yeast gives off during this growth that allows the bread to rise. That is why baking bread goes through so many "resting" stages when we let it "double" in size.


Sunday, January 8, 2012

Grilled Thyme Chicken with Roasted Potato Wedges and Brussel Sprouts

So tonight, I made chicken legs with roasted veggies - potatoes and brussel sprouts in case you missed the title of the blog today. Everyone loves potatoes but when it comes to brussel sprouts people either love or hate them. I love brussel sprouts. They're bitter, sweet and tender. In this recipe I cook them with the beloved Mrs. Dash. Salt free. I also gave them a large dose of duck fat. Duck fat is an excellent way to add flavor to roasted veggies and it doesn't burn like butter does.


To start, I marinate the chicken overnight in the following:

1/4 cup olive oil
1/4 cup white vinegar
1 tbsp lemon juice
1 tbsp garlic puree
1 tsp fresh thyme
2 pinches of fresh ground black pepper and salt


Get the grill heated to low and preheat your oven when you're ready to cook.


I preheat the oven to 400 degrees and prepare the brussel sprouts and potatoes. Trim the ucky brown nub off of the brussel sprouts and any browned leaves. Cut the potatoes into wedges. I usually do this by cutting each potato in half and quartering each half.  Then I toss the brussel sprouts and potatoes in a bowl with 2 tablespoons of Mrs. Dash. Pour veggie mix into a shallow casserole dish, put a few globs of duck fat on top before covering with  the top of the dish or aluminum foil. Gently turn the veggies after about 15 minutes to make sure they're cooking evenly. 


While the potatoes and brussel sprouts are cooking, get the chicken on the grill. Cooking the chicken at a low heat will maintain the moisture in the meat and make sure its done when your veggies are. The veggies take about 20 to 30 minutes to cook until tender so getting fire happy with your grill is not recommended. This is what my finished product looked like. It was moist, tender and delicious.


Friday, January 6, 2012

Lamb Pasties


January 6, 2012 - My First Blog Entry! Gracie [aka, Twinkle Toes] and I are getting off to a rough start on this food blogging project. But, this is the time for New Year's Resolutions; and I hope to post something once a week from now on.

So, today I picked up a lamb that was raised by Jesica [Stinson] Merrill at her Grandpa's farm. This is the third lamb we have gotten from Jesie. This lamb is absolutely wonderful; far better than anything I have ever bought from a store.

Lamb comprises a good share of our meat diet now but that was not always the case. When I was a kid, we occasionally ate lamb [mostly roast leg of lamb], but it was infrequent. Although I have always like the flavor of lamb quite a lot, I did not cook it often myself until both Twinkle Toes and her sister were found to be allergic to beef and pork when they were kids. Now, we eat more lamb than any other meat.

I have always believed that great food is the result of many things; not just the ingredients we use to prepare them. Family, friendships and experiences contribute a great deal to our experience of food [at least it does with our nutty family and friends]. 

 So, the story of how we came to know Jessie and her family plays a pivotal role in the lamb recipe I will blog about today.

When Twinkle Toes was in the second grade, she decided that Brownie Girl Scouts was not for her and asked to join 4 H. After some investigation, we found that The Busy Bees of Bowdoin met just five miles from our house. Jesie's mom, Ramona, was the leader of this group and her children; Danny, Amanda and Jessie, were all very active in it. Ramona's dad was a dairy farmer and made his cows available for the kids in 4 H to work with. Within a few months of joining, Twinkle Toes began her very first 4 H lease arrangement when her little Holstein calf was born. It was love at first sight.


Over the next few months [and for years afterward - she only stopped showing cows when she finished high school], she spent a lot of time at the farm. She had to train the cow to walk along with her. She had to help feed the cows and keep them clean. When it came to fair time in the summer, she had to learn how to groom her heifer so that it was ready to show. Because she spent so much time at the fairs, so did I. I was teaching math at the time and would work on lesson plans while waiting for the Gracie to have her turn in the ring.


For a city kid, I learned a great deal about the anatomy of a cow while I sat there and watched. I know the value of a good udder attachment, spring of rib and can recognize a good topline. To this day, when we go to agricultural fairs, I can still pick out the ones that will wind up with the blue ribbon. But I digress....

A big part of getting ready for the show ring was recognizing there was a lot of downtime in the barn. The kids had to be on the lookout for "tickets" [otherwise known as "cowpies"] and clean them up quickly before the cows made a mess of their shampooed and trimmed bodies. Because so many people come to agricultural fairs and enjoy seeing the animals, they also had to keep the rest of their barn tidy. Other than that, they ate a lot of fair food; they played and sometimes read... and they argued and they teased. This sometimes led to chasing each other around. Jesie, [remember Jesie] would sometimes chase her brother around with a pitchfork. He almost always deserved it. It might not sound amusing, but it was [Ramona may have had a different take on it though]. Over the years, we spent a lot of time together. I am grateful for the positive role Ramona and her Dad played in Gracie's life.


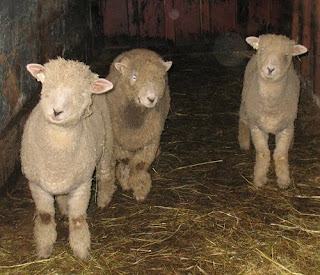
After a number of years, facebook brought us and the Stinson/Small/Merrill clans back together again and the rest is culinary history! I don't think Jessie chases Danny around with a pitchfork anymore, but even if she does, it wouldn't change the fact that that kid raises a mighty tasty lamb. The dairy farm where Gracie was a part of 4 H has been converted over to raising Boar goats and Dorset and Southdown sheep although there are still a few dairy cows, donkeys, ducks and chickens hanging around the barn. In fact, while I was there this morning, I got to see a newborn Jersey heifer - only a few hours old.


All the critters in the barn have a name; including the lamb I got today [his name was Homer - may he rest in peace]. Maybe getting a name is part of why the lamb is so good; being petted and cooed at probably helps too. Makes for stress free meat. Homer was a Southdown lamb; a breed raised primarily for meat.

Homer the lamb yielded about 57 pounds of meat. According to Ramona, that is about half of his total body weight. Tonight I will be using ground "Homer" to make Scottish Lamb Pasties. A Scottish Pasty [or Forfar Bridie] is usually made using ground beef, onions, salt, pepper and dried mustard and cooked inside of pastry dough [they look like a turnover]. Our pasties will use lamb, of course, together with some typical spices for seasoning lamb; fresh rosemary and thyme. I usually serve lamb pasties with fresh roasted brussels sprouts and carrots. Wash it down with a cold beer!

I hope you enjoy making them and eating them.


Lamb Pasties

To make this dish you will need a bowl to mix the pastry and one to mix the filling, a paring knife to chop the onions and spices, a rolling pin, a pastry brush, some wax paper and a cookie sheet or baking pan.

Pastry:
2 cups of flour
3/4 cup of shortening
1 tsp of salt
5 tbsp of water

Mix the first three ingredients with a fork until the shortening has been worked into the flour and salt. Add the water and combine. Do not overwork the pastry or it will be tough. Cover the bowl with a damp cloth while you make the filling.


 Filling:
1 pound of ground lamb
1 large onion chopped
1/2 tsp fresh rosemary
1/2 to 1 tsp of fresh thyme
salt and pepper to taste

Combine all filling ingredients together in a bowl.


Divide the pastry dough into six equal parts. Roll each part into a circle about 6 inches across [rolling dough is easier if you put it between two sheets of wax paper].


Place 1/6th of the filling on one half of each pastry circle.


Brush the edge of each circle of pastry to help it seal. Fold the other half of the pastry over the meat mixture and press the edges together.


Put the pasties on an ungreased cookie sheet or baking pan. Brush the tops with milk and cut a vent hold in each one. Put the bridies in an oven that has been preheated to 425 degrees and cook them for about 30 minutes.